How to Test Sensors and Hardware on Raspberry Pi (No Code Required)
Using the Top HAT Dashboard for Fast Raspberry Pi Hardware Testing
If you enjoy building Raspberry Pi projects, experimenting with sensors, or creating DIY automation systems, one problem shows up quickly:
Testing hardware takes time.
You connect a sensor… then write a test script.
You wire a relay… then write GPIO code.
You try RS-485… then debug serial communication.
Before long, the fun part — building your project — gets buried under setup work.
The Top HAT Dashboard solves that.
GitHub Repository:
https://github.com/Cirkitscape/Top_HAT_Dashboard
It’s a self-hosted Raspberry Pi dashboard designed for hobbyists who want to quickly test sensors, relays, and communication devices without writing code.
With the Top HAT Dashboard you can:
Monitor sensors instantly
Toggle outputs from your browser
Test RS-485 / Modbus devices
View connected USB devices
Control everything through a simple web interface
Just connect your hardware, open your browser, and start testing.
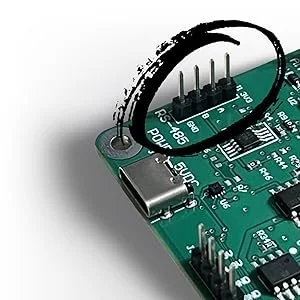
What Is the CirkitScape Top HAT?
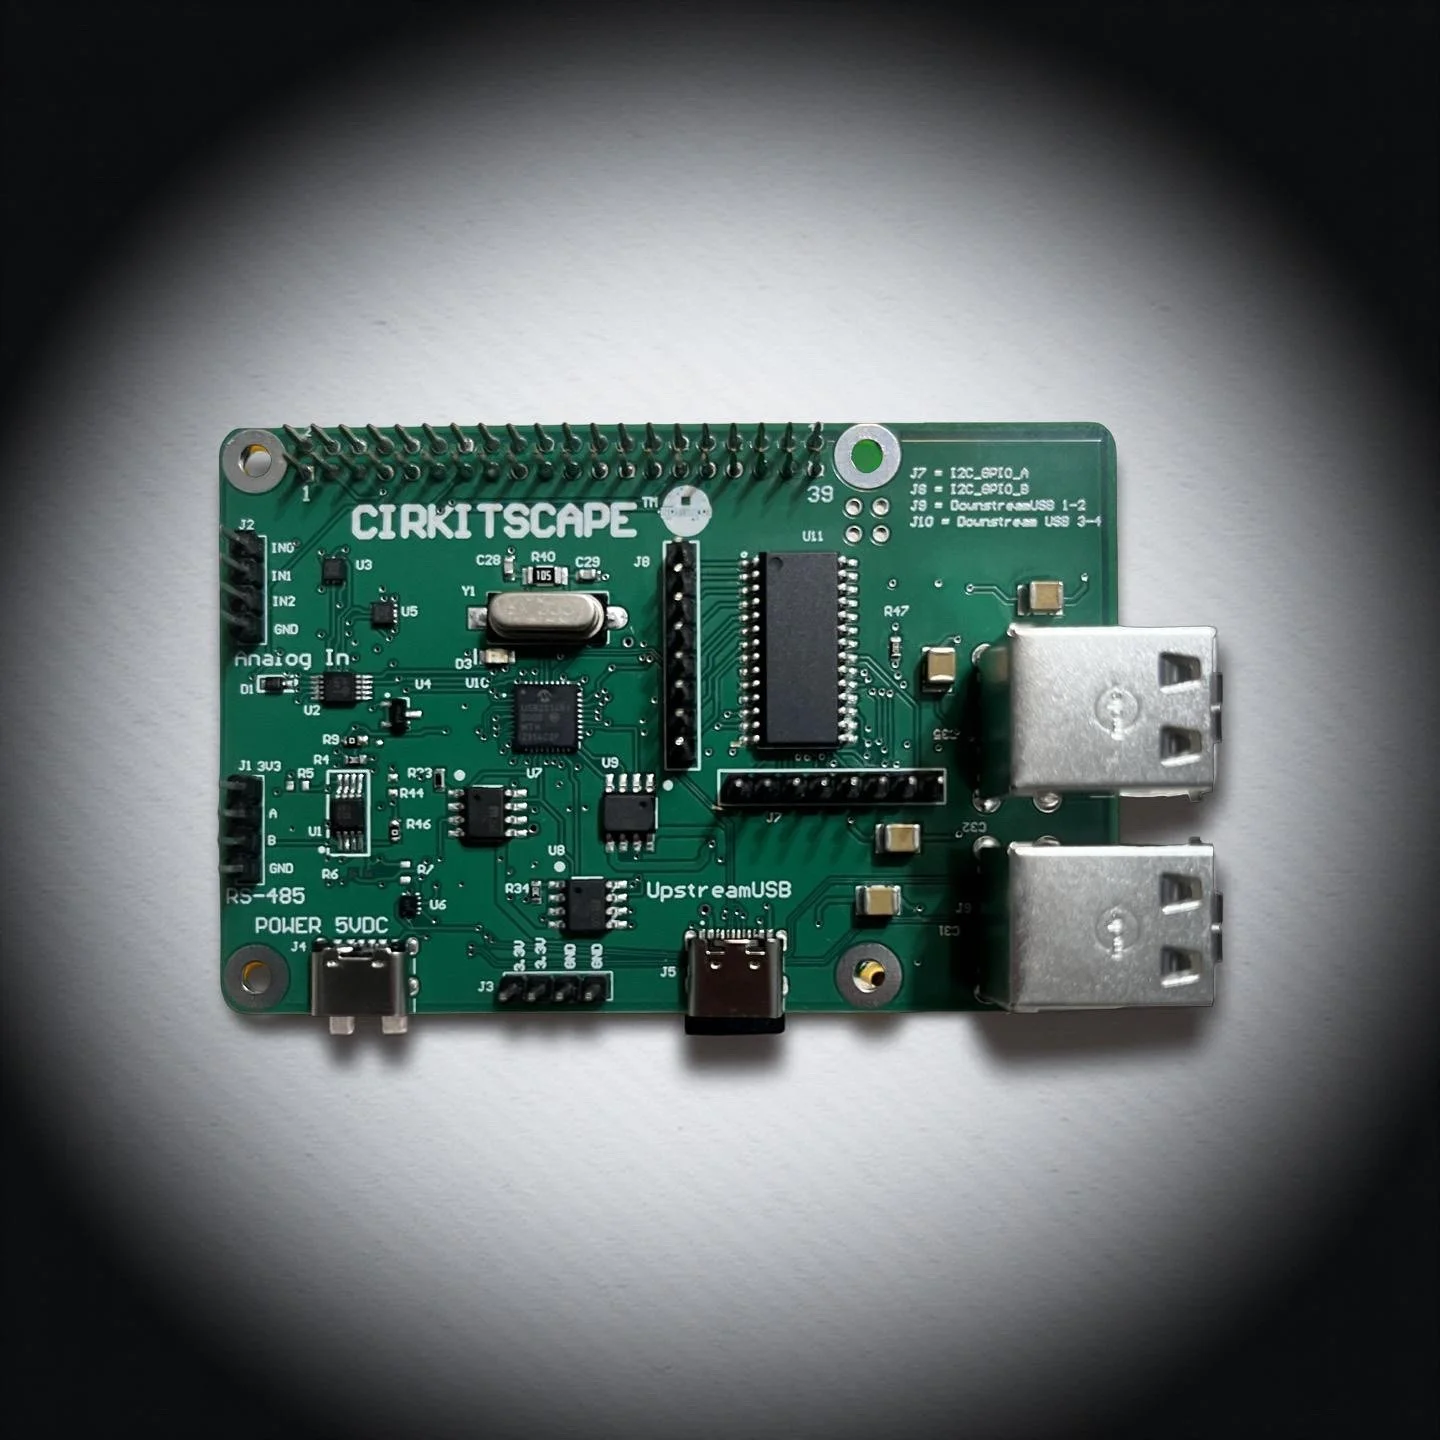
The CirkitScape Raspberry Pi Top HAT Expansion Board is a Raspberry Pi expansion board designed to make it easier to connect sensors, devices, and automation hardware.
Instead of combining multiple breakout boards or writing custom hardware test programs, the Top HAT adds several useful capabilities directly to the Raspberry Pi, including:
Analog sensor inputs for monitoring voltage-based sensors
Digital GPIO control for outputs and devices
RS-485 communication for Modbus and industrial sensors
USB connectivity for additional peripherals
The board mounts directly on top of the Raspberry Pi as a standard Raspberry Pi HAT, turning the Pi into a powerful hardware testing and automation platform.
For hobbyists, this means you can quickly connect hardware and start experimenting without designing custom electronics.
What Is the Top HAT Dashboard?
The Top HAT Dashboard is a local web interface that runs directly on your Raspberry Pi.
Once installed, you open a browser and get a control panel where you can:
View live analog sensor readings
Toggle digital outputs
Send RS-485 commands
Monitor USB devices
Check system status
Everything runs locally on the Raspberry Pi.
There are:
No cloud services
No subscriptions
No internet requirement
It’s a self-hosted Raspberry Pi hardware dashboard designed for testing and experimentation.
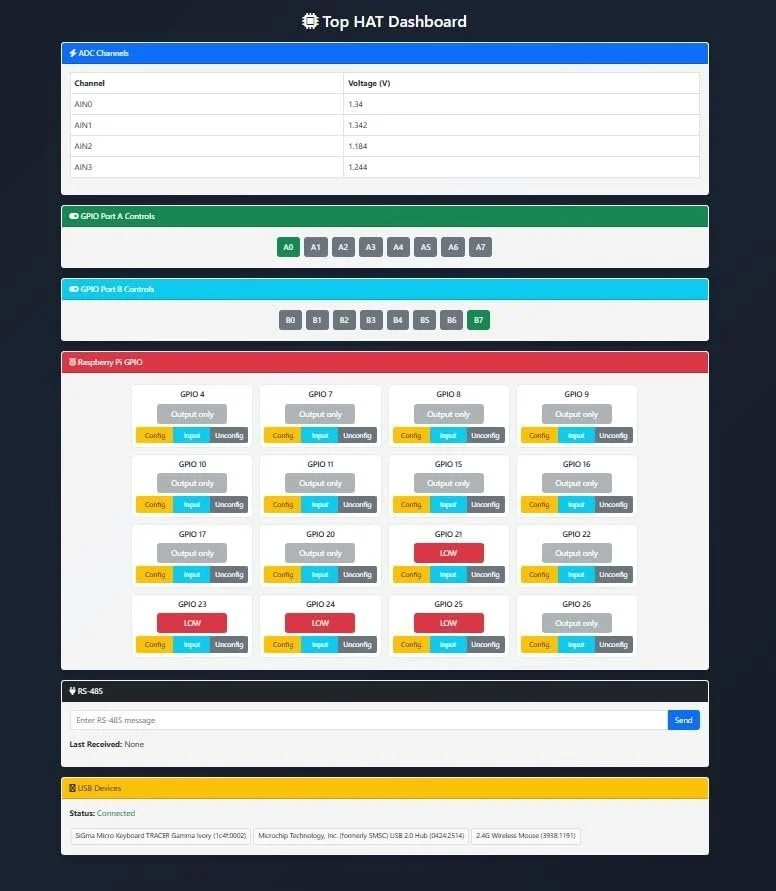
Image of Screenshot
Quickly Test Sensors Without Writing Code
One of the most frustrating parts of hobby electronics is needing to write code just to test a sensor.
Normally you would need to:
Install Python libraries
Write a script to read the sensor
Print values to the terminal
Debug wiring issues
With the Top HAT Dashboard, you skip all of that.
Just:
Connect your sensor
Power the Raspberry Pi
Open the dashboard in your browser
You instantly see the sensor readings.
This makes the dashboard an excellent Raspberry Pi sensor testing tool for hobbyists.
Debug Raspberry Pi Hardware Easily
The dashboard is also extremely useful when debugging Raspberry Pi projects.
When something isn’t working, it’s often unclear whether the problem is:
Wiring
Software
Communication
The sensor itself
Using the dashboard you can quickly:
Verify analog voltage readings
Toggle outputs to confirm relays work
Test RS-485 communication
Confirm connected USB devices
This makes the Top HAT Dashboard a powerful hardware debugging tool for Raspberry Pi projects.
Instead of guessing what might be wrong, you can quickly confirm whether the hardware is working correctly.
Example Project: Smart Garden Controller
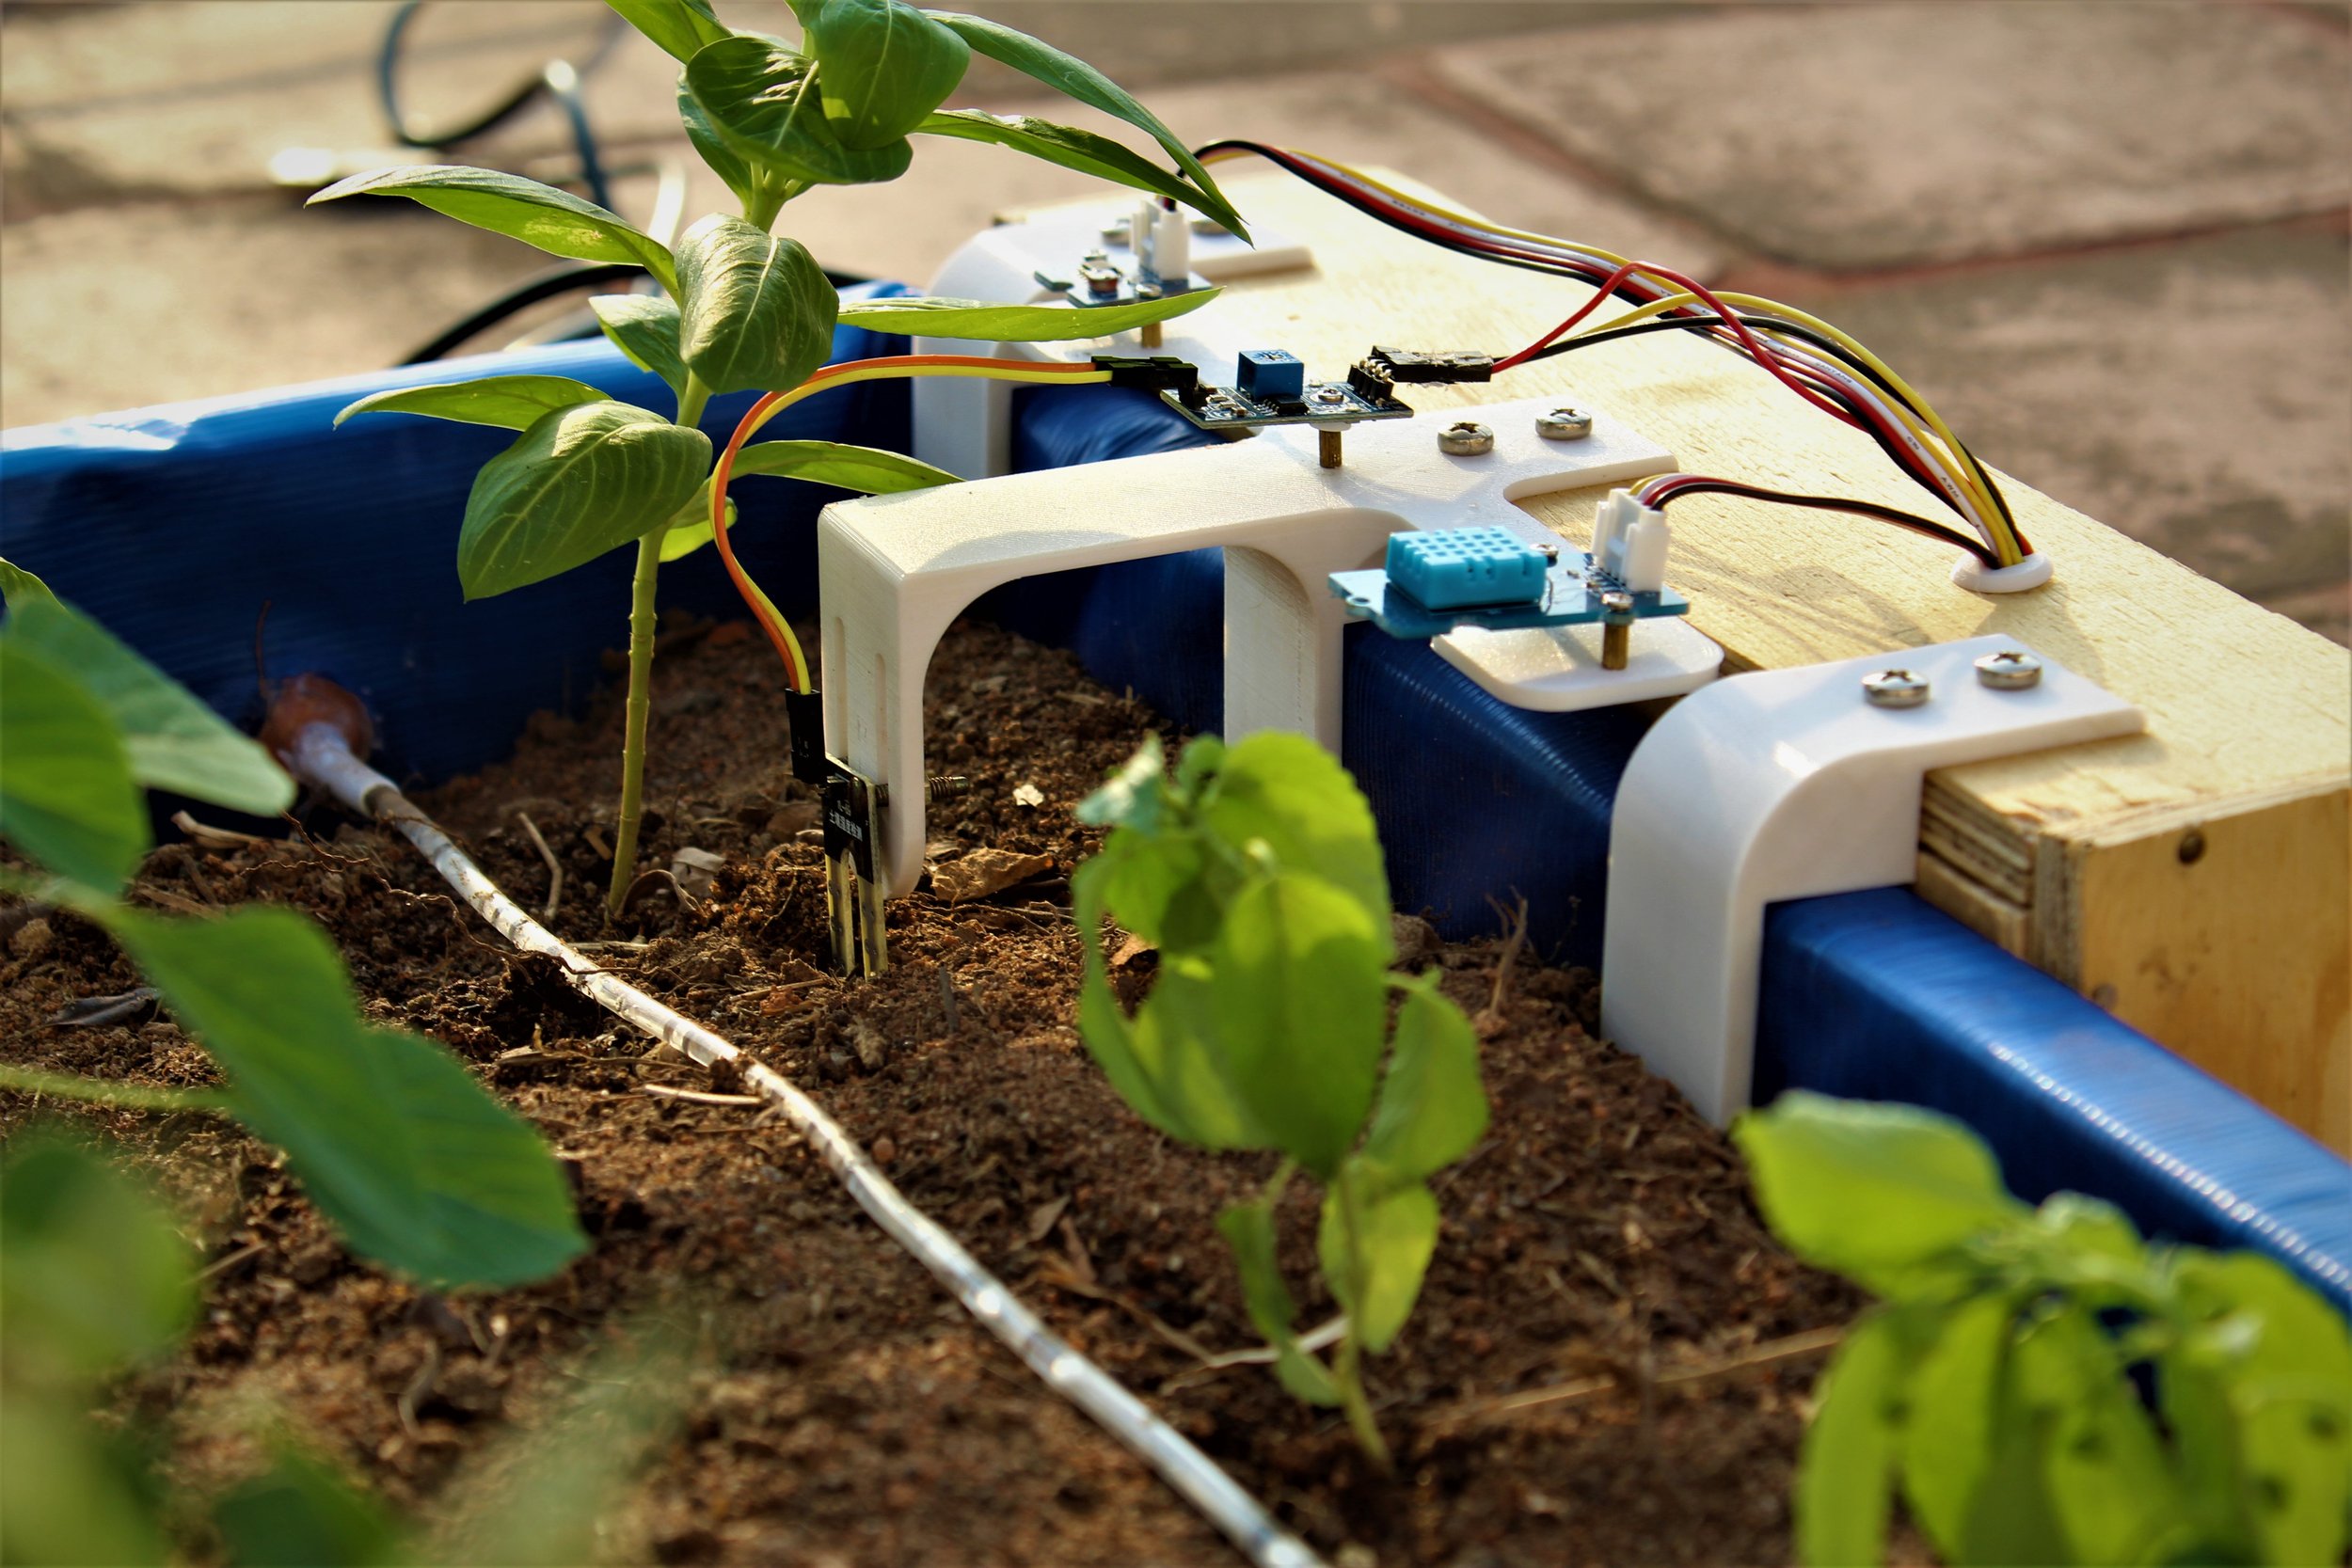
Imagine building a Raspberry Pi smart garden system.
Without a dashboard you would need to:
Write a soil moisture sensor script
Create relay control logic
Build a small web interface
With the Top HAT Dashboard:
Connect the soil sensor
Connect the pump relay
Open the dashboard
You can immediately test the sensor and control the pump from your browser.
This allows hobbyists to validate hardware before writing any custom code.
Test RS-485 and Modbus Devices
Many hobbyists want to experiment with RS-485 communication or Modbus sensors, but communication setup can be complicated.
The Top HAT includes built-in RS-485 capability.
The dashboard allows you to:
Send test messages
Receive responses
Verify communication with sensors
Experiment with multi-device networks
This makes it a great learning platform for industrial communication with Raspberry Pi.
Fully Local Raspberry Pi Dashboard
Everything runs directly on your Raspberry Pi.
That means:
No internet required
No cloud dashboards
No subscription costs
Full control over your project
For makers who prefer self-hosted tools, this is a major advantage.
Perfect for Raspberry Pi Hobby Projects
The Top HAT Dashboard works great for projects such as:
Raspberry Pi smart garden controllers
DIY greenhouse automation
Home automation experiments
Sensor monitoring dashboards
Workshop relay control systems
STEM electronics learning labs
It helps hobbyists test hardware quickly and build projects faster.
Frequently Asked Questions
How can I test sensors on Raspberry Pi without writing code?
You can use a web dashboard like the Top HAT Dashboard. It allows you to connect sensors and instantly view readings through a browser without writing custom scripts.
How do you debug Raspberry Pi hardware connections?
You can debug hardware by checking live sensor readings, toggling GPIO outputs, and verifying device communication. Tools like the Top HAT Dashboard provide a visual interface for testing these connections.
What is RS-485 used for with Raspberry Pi?
RS-485 is commonly used for industrial sensors and Modbus devices. It allows reliable communication over longer cables and supports multiple devices on the same communication bus.
Can Raspberry Pi be used for hardware testing?
Yes. Raspberry Pi is widely used as a hardware testing and prototyping platform for sensors, automation systems, and IoT projects. Dashboards and monitoring tools make testing hardware much easier.
Final Thoughts
For Raspberry Pi hobbyists, the hardest part of a project is often the setup.
The Top HAT Dashboard makes hardware testing simple by providing:
A ready-to-use Raspberry Pi dashboard
Instant sensor monitoring
Easy output control
RS-485 testing tools
A fast way to debug hardware
Instead of writing setup code, you can focus on what matters most — building.
Explore the project:
https://github.com/Cirkitscape/Top_HAT_Dashboard
Plug it in.
Open the dashboard.
Start testing your next Raspberry Pi project.