
Build a Raspberry Pi Smart Garden with Cirkit Garden
Building a self-watering garden system is a practical way to combine Raspberry Pi control, environmental sensing, and web-based automation in one project. In this build, I used a Raspberry Pi, a Cirkitscape Top HAT, moisture and water sensors, and a 12V DC pump to create a system that can monitor garden conditions and control watering from a web interface.
The goal was simple: build a garden monitoring and watering setup that is easier to configure and manage than a command-line-only system. By using the Cirkit Garden app as the software layer, the hardware can be monitored and controlled from a cleaner interface without having to build a custom dashboard from scratch.
This project is a good example of how Raspberry Pi garden automation can be built using standard components, GPIO control, and a browser-based UI.
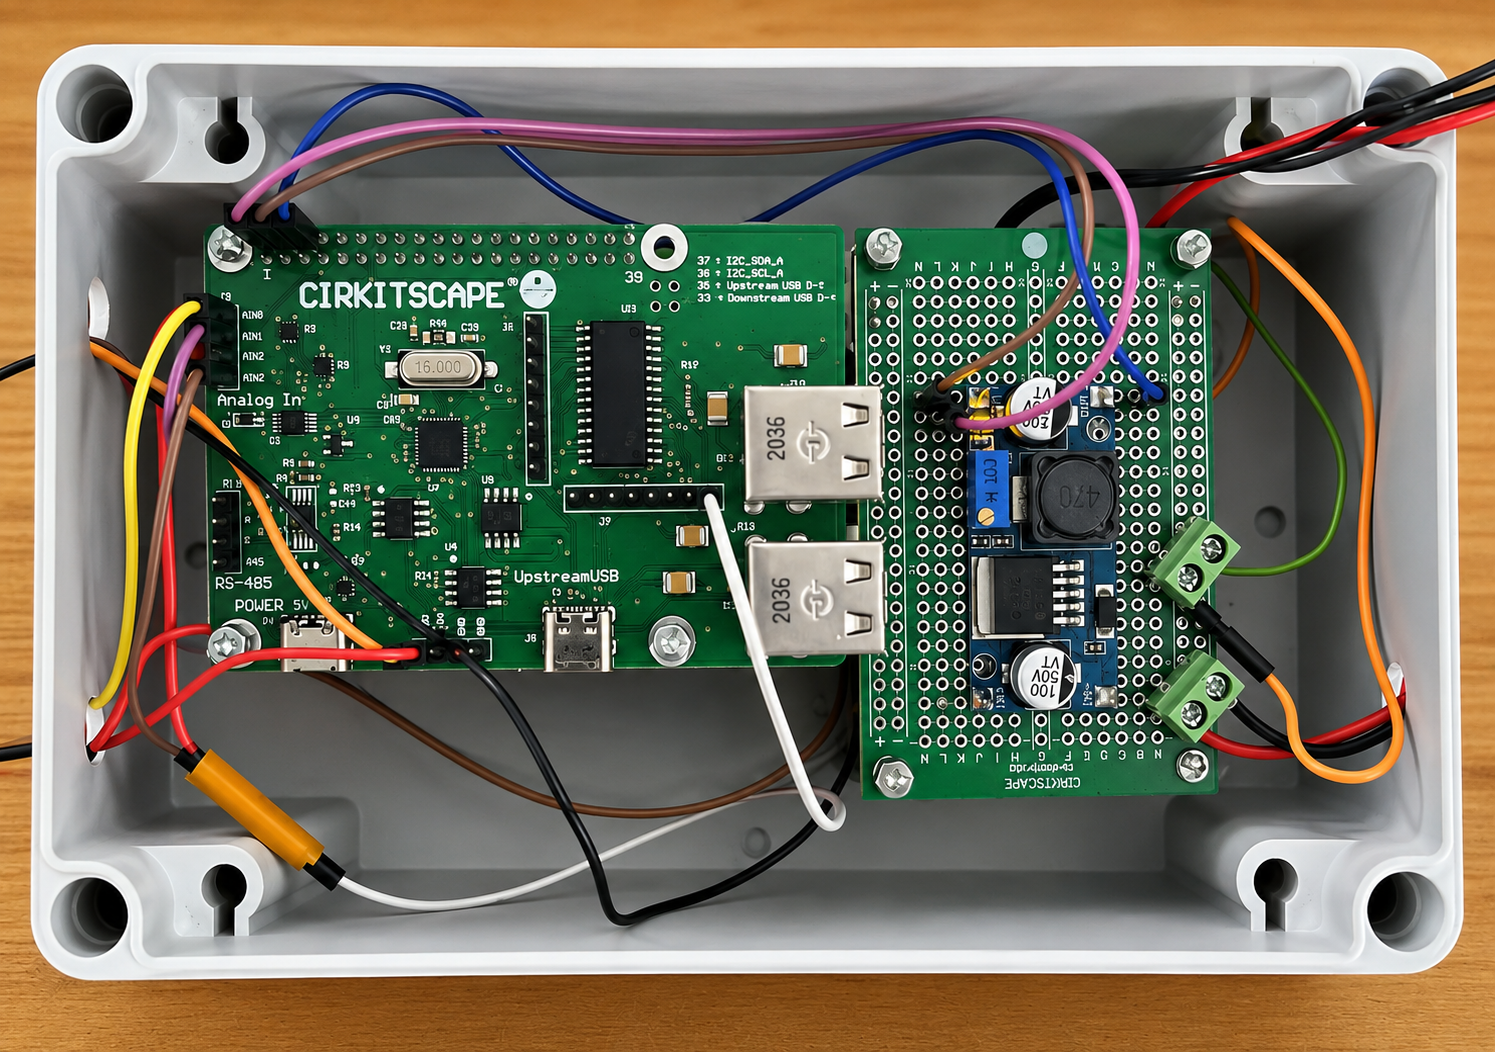
Project Overview
The Raspberry Pi acts as the main controller for the system. A Cirkitscape Top HAT connects the sensors and output hardware, while the software provides the control layer for configuring devices and managing watering behavior.
In this setup:
- a soil moisture sensor tracks how dry the soil is
- an IR water sensor helps detect water presence or level
- a 12V DC pump provides the watering action
- the Cirkit Garden app provides the web-based control and monitoring interface
This combination makes it possible to build a small self-watering garden system that is easier to expand later with rules, alerts, logging, and additional sensors.

Materials Used
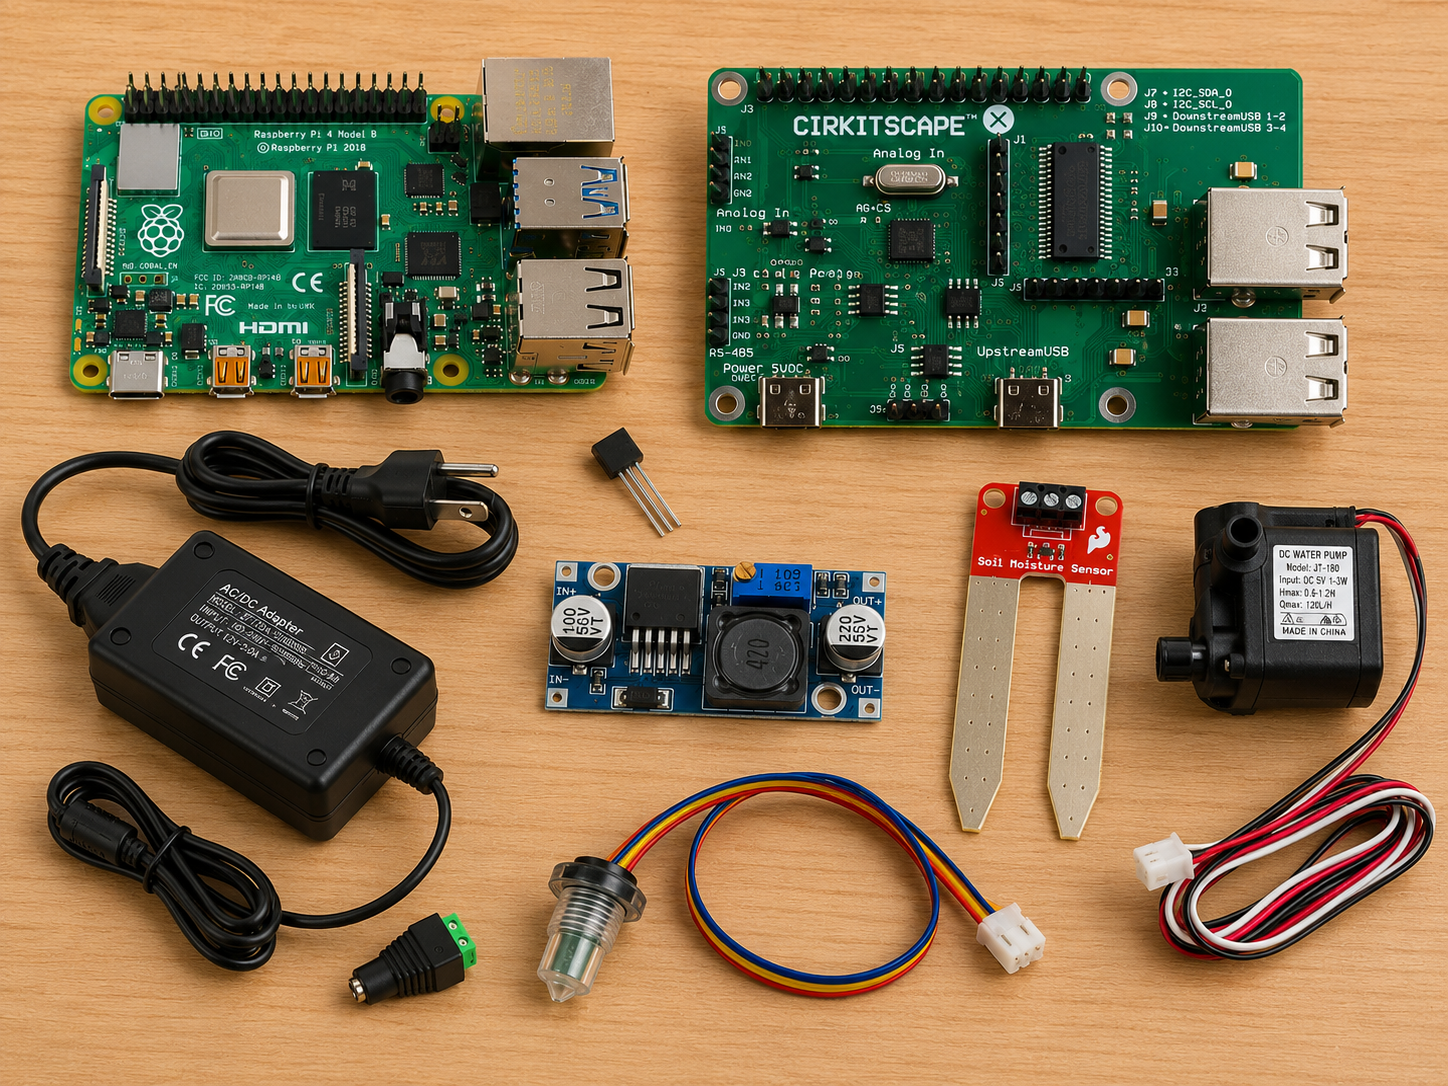
For this project, I used:
- Raspberry Pi
- Cirkitscape Top HAT
- IR Water Sensor — FS-IR02B
- Soil Moisture Sensor — SEN-13637
- 12V DC to 5V DC buck converter
- 12V AC power adapter
- 12V DC pump
- NPN transistor — 2N4401
- Resistor
- Wiring and connectors
Step 1: Build the Power and Pump Switching Boards
The first step was building the power board and the pump switching board.
Because the Raspberry Pi runs on 5V and the pump runs on 12V, the system needs two separate voltage levels:
- 12V for the pump
- 5V for the Raspberry Pi and control electronics
I used a 12V DC power adapter as the main source, then stepped it down to 5V for the Raspberry Pi using a buck converter.
For pump control, I used an NPN transistor as a switching stage between the Raspberry Pi GPIO and the 12V pump. This is important because a Raspberry Pi GPIO pin should never drive a pump directly. The GPIO pin only provides the control signal, while the switching circuit handles the higher-power load.

Step 2: Connect the Top HAT to the Raspberry Pi
Next, I connected the Cirkitscape Top HAT to the Raspberry Pi.
The Top HAT acts as the hardware interface between the Pi and the rest of the garden system. It simplifies sensor wiring, output control, and overall integration, making the project easier to assemble and troubleshoot.
Before applying power, I verified that all wiring and connections were secure.
Step 3: Connect the Pump Control Wire to the Desired GPIO
After building the pump switching circuit, I connected the pump control wire to the GPIO pin I wanted to use.
That pin is later mapped inside the Cirkit Garden app so the software knows which output controls watering. The GPIO is not powering the pump directly. Instead, it sends a control signal to the transistor circuit, which switches the pump on and off safely.
Step 4: Verify the Power Output
Before connecting the Raspberry Pi, I checked the output of the buck converter.
This is one of the most important steps in the build. The Raspberry Pi requires a stable 5V supply, and applying too much voltage can damage the board.
I adjusted the buck converter until it measured 5V, then powered the system down, connected the Pi, and powered it back up.
Step 5: Install the Top HAT Dependencies
With the hardware assembled, I installed the required software dependencies.
The setup script for the Top HAT is available in the documentation on the Top HAT product page. After downloading it, I ran the script on the Raspberry Pi to install the software needed for the HAT and sensor communication.
Step 6: Download and Set Up the Cirkit Garden App
Next, I set up the Cirkit Garden app.
After accessing the app, I created an account and set up a new garden. That garden becomes the main dashboard where sensors, devices, and outputs can be monitored and configured.
For a Raspberry Pi watering project like this, having a web-based dashboard makes a major difference. Instead of managing every sensor and output manually in code, the app provides a structured way to configure and operate the system.
Step 7: Connect the Sensors to the Top HAT
Once the software layer was ready, I connected the sensors to the Top HAT.
The two sensors used in this build were:
- FS-IR02B IR water sensor
- SEN-13637 soil moisture sensor
The soil moisture sensor is used to monitor how dry the growing medium is. The IR water sensor can be used to detect water presence, depending on how the watering system is physically arranged.
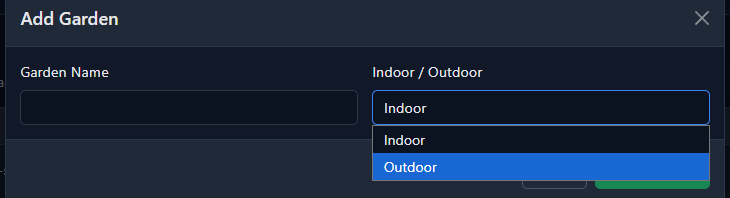
Step 8: Add the Garden in the App
With the app installed, I first created the garden environment I wanted to manage.
That garden becomes the main workspace for the project. It gives the system a defined place where sensors, devices, and outputs can be organized instead of being handled as disconnected pieces.
Step 9: Add the Device and Sensor
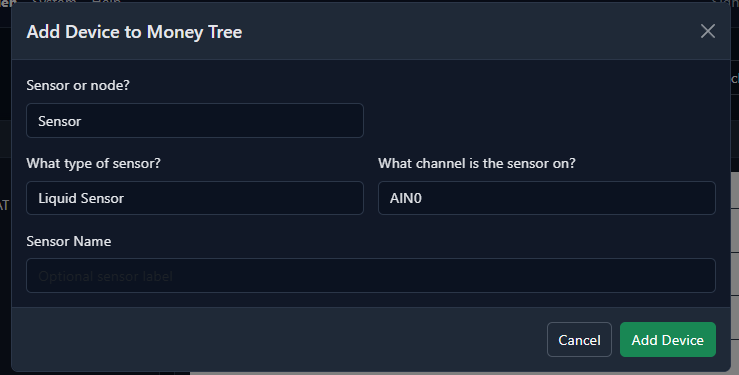
After creating the garden, I added the hardware I planned to use inside the Cirkit Garden app and assigned it to the correct input channel so the system could read sensor data from the proper source.
Step 10: Configure the Garden, Device, and Sensor
Once the device and sensor were added, I configured the garden so each one was mapped correctly.
This included confirming the sensor input path and assigning the pump to the correct output channel so the system knew exactly which hardware path to activate for watering.
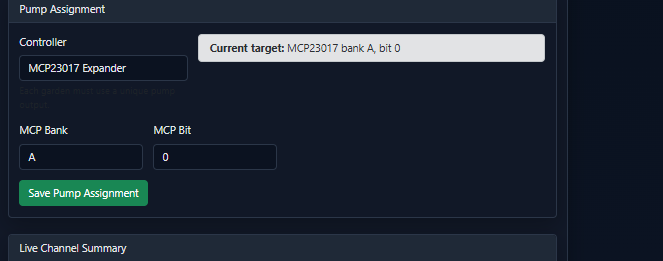
This is where the project really comes together. The hardware is already connected, but the software configuration is what makes the system usable. Instead of manually triggering outputs or polling sensors from custom scripts, Cirkit Garden provides a clearer way to map inputs, assign outputs, and manage the garden from one interface.
If you are building a monitoring-only setup, this can be simplified. But for a self-watering garden, output configuration is what makes automatic or remote watering possible.
Step 11: Add the Sensor to the Environment
After the sensor and device were configured, I added the sensor into the garden environment I wanted to monitor.
At that point, the app became the main control panel for the system. From there, I could view connected sensors, monitor garden conditions, and control the watering hardware without working directly from the command line.
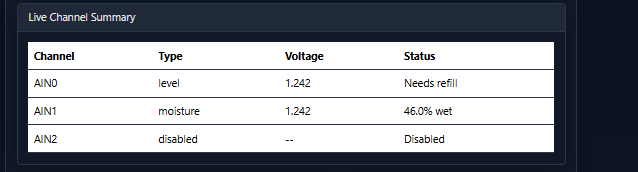
This makes the system much easier to operate day to day. Instead of treating each device as a separate piece of hardware, the app brings the sensors, outputs, and control structure together in one place.
Final Result
By the end of the build, the Raspberry Pi was acting as the garden controller: reading both sensors, exposing the system through the web interface, and switching the watering pump through the configured output.
The final system includes:
- soil moisture sensing for irrigation decisions
- water-presence detection
- pump control through the assigned output
- browser-based monitoring and garden management
Lessons Learned
The most important lesson in this build was power management. Because the Raspberry Pi and pump run at different voltages, it is critical to verify the buck converter output before connecting the Pi.
Another key lesson was isolating the pump from the Raspberry Pi GPIO. Using a transistor-based switching circuit protects the Raspberry Pi and allows a low-power control signal to operate a higher-power device safely.
A third takeaway is that software configuration matters just as much as hardware assembly. Once the system is wired correctly, a clean interface like Cirkit Garden makes it much easier to add devices, assign channels, and manage the project.
Conclusion
This Raspberry Pi self-watering garden project combines hardware control, environmental sensing, and web-based monitoring into a practical automation system.
By using the Cirkitscape Top HAT and Cirkit Garden, I was able to focus on building and configuring the garden system instead of spending time creating a custom control interface from scratch. The result is a more manageable and expandable platform for garden monitoring and watering control.
As a foundation, this project opens the door to future upgrades like automated watering rules, sensor-based triggers, alerts, data logging, and more advanced environmental monitoring.
Get Started with CirkitScape
If you want to build a similar Raspberry Pi watering or monitoring system, the Cirkitscape Top HAT and Cirkit Garden provide a practical starting point. They make it easier to connect sensors, manage outputs, and configure a garden automation setup from a web interface instead of piecing everything together from scratch.
To learn more, explore the Top HAT documentation and the Cirkit Garden platform to see how the hardware and software fit together for garden monitoring, watering control, and future automation upgrades.